
Sorting out your walls after damp treatment isn’t just a finishing task – it’s a vital step in making sure the issue doesn’t creep back in through the cracks. Plenty of people tackle the damp itself, breathe a sigh of relief, then slap on new paint or plaster sharpish, only to find it bubbling, flaking, or worse within a year. If you’ve had damp proofing work done – especially injections or a new damp proof course (DPC) – the plastering and wall repair that follows has to be deliberate, properly timed, and done using the right materials. Let’s walk through the key steps, so everything stays dry, sound, and smart-looking.
Stripping Back: The Plaster Has to Go
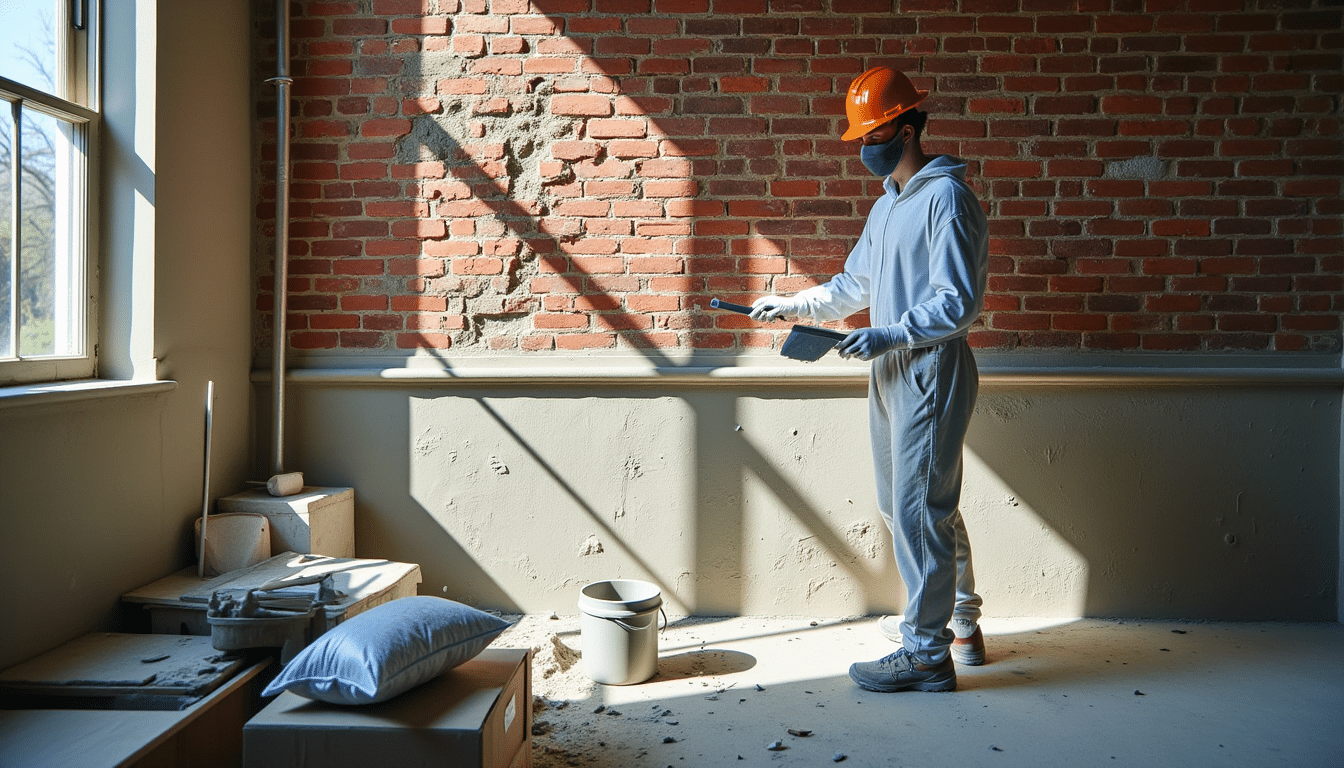
First off, any plaster that’s been touched by rising damp or penetrating moisture needs to come off. No two ways about it. Even when the wall feels dry, salts left behind in the old plaster act like a sponge, pulling moisture back in from the air or the brickwork if there’s still any trace of damp. These are called hygroscopic salts, and they’re one of the main culprits behind fresh damp patches or peeling paint weeks after redecoration.
Strip everything back to at least 1 metre above the highest known point of damp or higher if that’s what your survey recommends. Get right back to bare masonry, and if you’ve got a cavity wall, make sure you inspect the cavity insulation and wall ties too – moisture damage loves to hide in those pockets.
Let It Breathe: Drying Time Matters
Once your damp proof course has gone in – whether chemical injection, membrane, slate layer, or otherwise – you need to give the wall time to dry properly. I know it’s tempting to get going straight away, especially if you’ve got trades lined up or rooms out of action, but plastering too soon will only trap moisture beneath your new finish.
There’s an old rule of thumb: allow around one month of drying time per inch of wall thickness. If you’ve got 9-inch solid brick walls (and many old Lancashire terraces do), you’re looking at about 9 weeks minimum. Chemical DPCs usually ask for a 2-4 week curing time before any plastering is safe – it varies by product, so check the manufacturer’s spec.
Don’t guess – grab a proper moisture meter and check that your walls are down to a safe reading. Surface dryness isn’t enough; salts can still be active even when a wall *feels* dry to the touch.
Choosing the Right Replastering System
Not all plaster is up to the job post-damp treatment. You want something that’ll resist future salt transfer and keep moisture where it should be: out. A modified sand and cement render is a tried-and-tested method, especially for traditional buildings where breathable solutions aren’t feasible due to previous treatments.
Here’s how the system tends to go:
- First Coat: Mix three parts sharp, washed sand to one part cement. Use clean water and stir in a proprietary waterproofing admixture to make the render more resistant to moisture and salt migration. Apply at about 12mm thick, and scratch the surface while it’s firming up. This gives your second coat a good key.
- Second Coat: Same mix again, this time at around 8-10mm. Apply smoothly over the first coat and float it to a flat finish before it fully sets.
Leave this to cure properly before any decorative plastering or finishing. If you’re aiming for a topcoat skim over the top, use a salt-resistant plasterboard dot-and-dabbed onto dabs made of the same sand and cement mix – don’t revert back to gypsum on bare wall.
Alternative Finishes for Sensitive Walls
If you’re working in a heritage property or an old solid-walled home where breathability is vital, you might consider lime plaster finishes instead. This sort of system allows residual moisture to evaporate naturally and behaves more like the original materials might have done 100 years ago.
That said, lime needs more care and longer setting times. It doesn’t pair well with modern paint systems either, so it’s best used as part of a larger breathable build-up (like a lime render outside and breathable paints like distemper inside).
Final Finish: Don’t Rush Decoration
Even after plastering, take your time before reaching for the paint. Let the new plaster dry out completely – usually a couple of weeks for skimmed surfaces, longer for full sand and cement builds. And always start with a breathable mist coat (a watered-down emulsion or a dedicated breathable primer) if you’re painting. Avoid vinyl paints for at least the first year – they trap moisture where you don’t need it.
Takeaway Tip
The best post-damp wall repair doesn’t just hide old damage – it prevents future issues. Always strip plaster back past the highest point of damp, let your walls dry thoroughly (even if it means waiting extra weeks), and use salt-resistant or waterproof render systems to stop problems coming back. Trust the process, and you’ll have clean, healthy walls that stay that way for years.