There’s something grounding about tending to plants – hands in soil, the immediate results of care and attention, the small wins as green shoots appear. But what transforms a pleasant afternoon of gardening into a smooth, satisfying operation? A dedicated workspace that works *with* you. That’s precisely what a DIY wooden potting bench with a sink achieves, and it’s one of those garden additions that you’ll wish you’d built years ago.
I’ve been delving into The Carpenter’s Daughter’s excellent tutorial on this project, and let me tell you – it’s clear, no-nonsense guidance from someone who’s definitely put it through its paces. Here’s what I took away from it, along with a few experienced observations of my own.
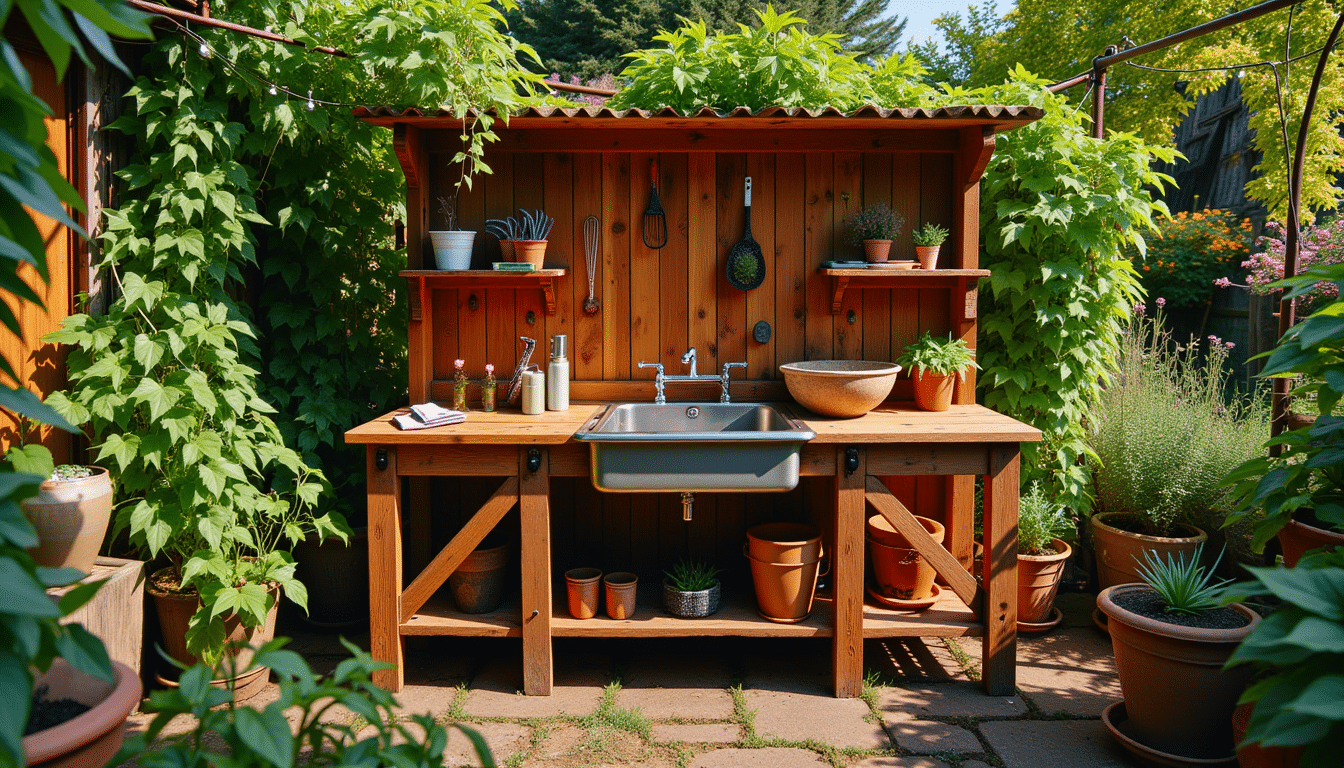
The Power of a Purpose-Built Bench
First off, let’s talk about *why* this design works so well. Most of us shuffle between compost bags, trays, pots, watering cans, and tools scattered around the shed or greenhouse floor. It’s messy, inefficient, and usually followed by a good hand scrub under a cold outdoor tap.
This bench design puts everything in one place. Sturdy shelves for storage. A spacious, waist-height worktop for kneeling-free potting. And the game-changer – a built-in sink, ideal for rinsing vegetables fresh from the ground or scrubbing tools before they rust into retirement. It’s a tidy, satisfying addition that elevates your garden setup.
Let’s break down how to actually build one – without frustration, over-complication, or costly mistakes.
Start Smart: Materials that Last
Here in Cumbria, we get our fair share of wet weather, so longevity matters. That’s why pressure-treated timber is non-negotiable. It can stand up to the elements and gives you years of use with the right care.
You’ll want a combination of 2x4s (for the frame and legs) and slatted timber or decking boards for the shelves and top. Most DIY-savvy homeowners will have the basic tools already – saw, drill, level, tape measure – but don’t skimp on protection. Gloves and eye protection aren’t optional; they’re smart.
As for the sink? An upcycled stainless-steel basin is perfect. They’re often available for next to nothing second-hand, and they clean up beautifully with a bit of elbow grease. Just be sure to check the sizing during your planning phase.
Planning Makes Perfect
Before you lift a saw or drive a screw, download the free plans mentioned in the original guide. These give precise cut lists and step-by-step visuals, which are a huge help if you’re not sketching it out yourself.
Here’s my advice: do a dry run first. Lay out the cuts against your chosen sink so you’re confident about fit before building. And measure your available space – not all gardens are created equal, and a bench that juts out or blocks a walkway quickly becomes an annoyance. While you’re at it, set your worktop height to your standing elbow level – you’ll thank yourself after your first full day of transplanting.
Building the Frame
This part’s fairly standard joinery. Start with the bottom rectangle frame, checking for square corners with a builder’s square or diagonally measured lines. If they’re equal, your frame is square. Use exterior-grade screws, and don’t be tempted by nails – they’ll loosen with time and moisture.
Add supporting legs and a middle brace. Then move upward, securing your lower shelf slats and finally the worktop. The secret to a tidy finish? Sanding before assembly, not after, and applying a wood preservative before final construction to make sure all faces are sealed.
The sink is fitted next – some builders choose to cut the basin shape directly into a solid timber top; others leave space and lower the sink in with supports. Either way, secure it snugly and add a simple drain. For most home gardeners, a bucket underneath or a hose running to a soakaway is plenty practical and keeps plumbing complexity to a minimum.
The Finishing Touches
Paint or stain it depending on your preferred style. I lean towards outdoor oil-based stains in muted tones – soft green, slate grey, or even a scorched wood finish if you’re confident with a torch. They blend in with the garden and weather gracefully.
Then kit it out: hooks for tools, a shelf for seed trays, maybe even a hanging rod for gloves and brushes. This is your bench – make it earn its keep.
Final Word: Build Once, Use Often
Here’s a handy rule of thumb: if you go to your potting bench three times in one gardening session, you’ve designed it right. And trust me – you will. It becomes more than a bench; it’s a base of operations, a bit of peace and order in the day-to-day mess of compost bags and random seed packets.
If you’re on the fence about doing it yourself, don’t be. With thoughtful planning, solid materials, and a weekend of graft, you’ll have a durable, handsome workstation that’ll serve you season after season.
Expert takeaway: Opt for modular fittings like removable shelves or adjustable feet if your bench is moving between soft earth and paving slabs. Flexibility always wins when you’re working with outdoor projects that have to adapt to changing conditions.
Happy building – and don’t forget to admire your handiwork over a hard-earned cuppa.